These days, containerization is a trendy issue in the tech industry. Although it’s been around for some time, it’s only recently become a prominent trend. You can use Docker or Kubernetes—or even both—to work with containers. Each has its own set of advantages and disadvantages. But which technology is better for which types of projects? To clarify, let’s look at some ways to understand the differences between Docker and Kubernetes.
In this tutorial, you’ll learn how to get started with Docker and Kubernetes on Amazon Web Services (AWS) by deploying a containerized application on Amazon Lightsail, create a Kubernetes cluster on AWS Elastic Kubernetes Service (EKS), and use Docker and Kubernetes on an application.
Docker vs. Kubernetes
Containers are an operating system virtualization technology designed to allow you to execute more software components on the same hardware. Containerization enables developers to build and run apps in a repeatable, efficient, and more secure fashion.
Overall, Docker and Kubernetes are two of the most popular ways of deploying containers. It’s not always easy to differentiate between the two, but some key features may help you decide which one is right for your needs.
We’ll compare and contrast Docker with Kubernetes, highlighting the significant differences in terms of features and limitations.
Docker
Docker is a tool for automating application building in lightweight containers so they can run smoothly in a variety of environments.
PayPal, Netflix, Stripe, Segment, Adobe, Verizon, and AT&T all use Docker. Let’s look at the features and limitations of Docker.
Features of Docker
- Docker is a container technology, which implies it isolates an application’s environment.
- Docker is a container platform for configuring, building, and distributing containers.
- It helps automate the building and deployment of applications.
- Applications are deployed in the form of services.
- You cannot auto-scale Docker.
- It scales vertically.
Limitations of Docker
- Docker has low fault tolerance.
- Docker lacks some features, such as container self-registration and self-inspect.
- Graphical apps or GUIs can’t be run inside a container.
Kubernetes
Kubernetes is an open-source platform used to maintain and deploy a group of containers at runtime. It’s mostly used alongside Docker for better control and implementation of containerized applications.
Huawei, Adidas, Buffer, IBM, Pinterest, OpenAI, and Spotify are some of the companies using Kubernetes. Let’s take a look at its features and limitations.
Features of Kubernetes
- Kubernetes helps provide an infrastructure for managing multiple containers.
- It’s an ecosystem for managing a cluster of Docker containers.
- It helps in automating, scheduling, and managing application containers.
- Pods, deployment, and services are all used to deploy applications.
- Kubernetes can be auto-scaled.
- It scales horizontally.
Limitations of Kubernetes
- Kubernetes is hard to set up and configure.
- It has a steep learning curve.
- Kubernetes is not readily compatible with Docker.
Building Apps Using Docker and Kubernetes
In this section, you’ll learn how to get started with Docker and Kubernetes by containerizing a simple application and deploying it to the cloud on AWS.
Prerequisites
To follow along with this tutorial, you need a basic knowledge of programming, a code editor (preferably VS Code), and an AWS account. You also need to download and install the following:
- AWS Command Line Interface (CLI)
- Docker
- Lightsail Control (lightsailctl) plug-in
- Docker VS Code extension
- Elastic Kubernetes service command tool (eksctl)
- kubectl
- minikube
Getting Started With Docker
You’ll deploy a Docker container on AWS Lightsail, but first, make sure you’ve gone through the prerequisites and installed the required software.
Create a Container Service on Amazon Lightsail
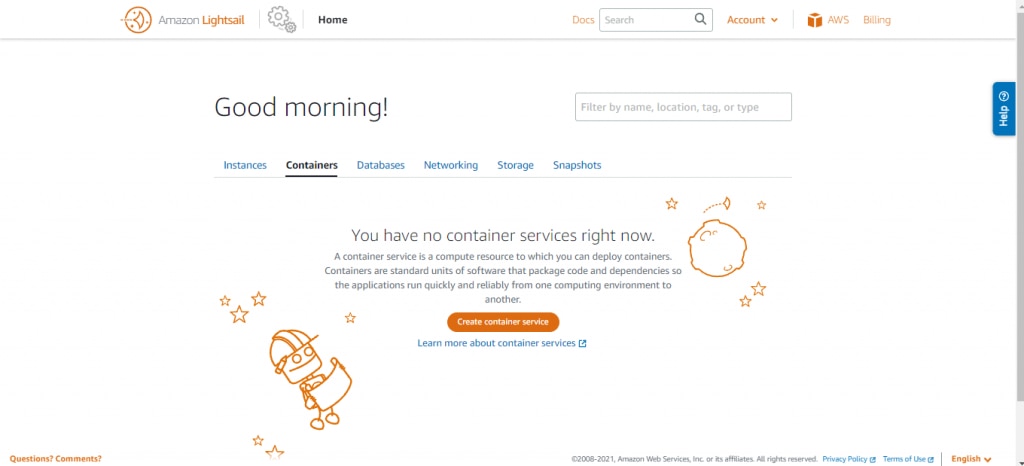
After signing up for an AWS account, log in to your console and search for Amazon Lightsail to create a container service.
On your Lightsail console, go to the container tab and click Create container service.
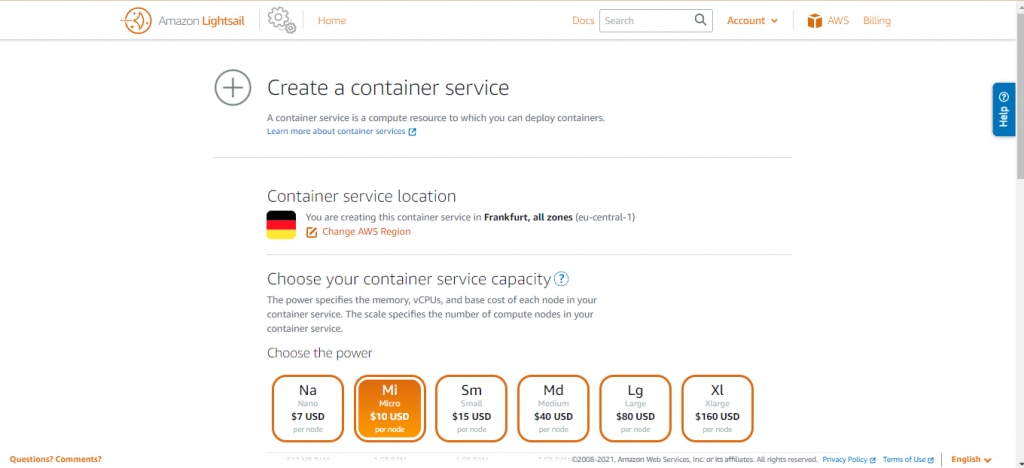
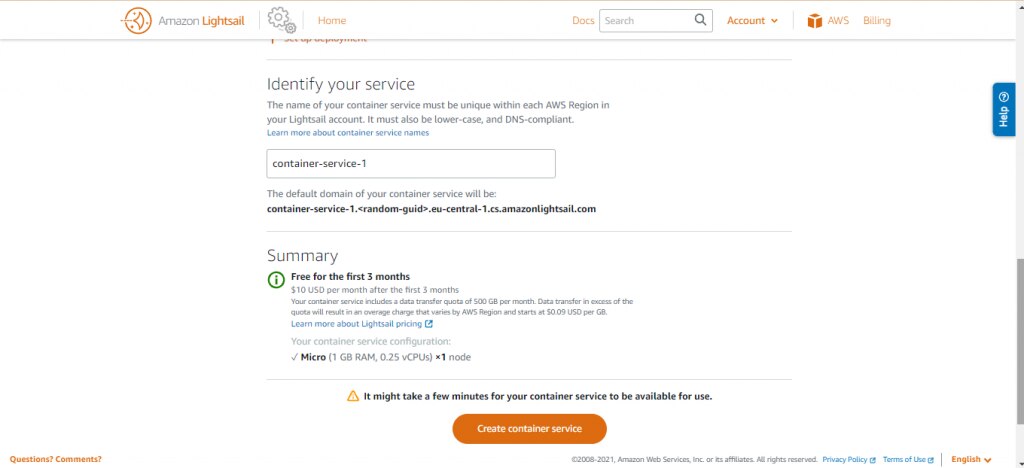
Next, set up your container service by choosing your desired configurations. For this tutorial, leave the default settings. Note: after following this tutorial, don’t forget to shut down all services or instances you’ve created to avoid being charged.
Now, click Create container service to create it and wait a few minutes for it to be completely deployed.
After deploying your container service, your screen should look like the image below:
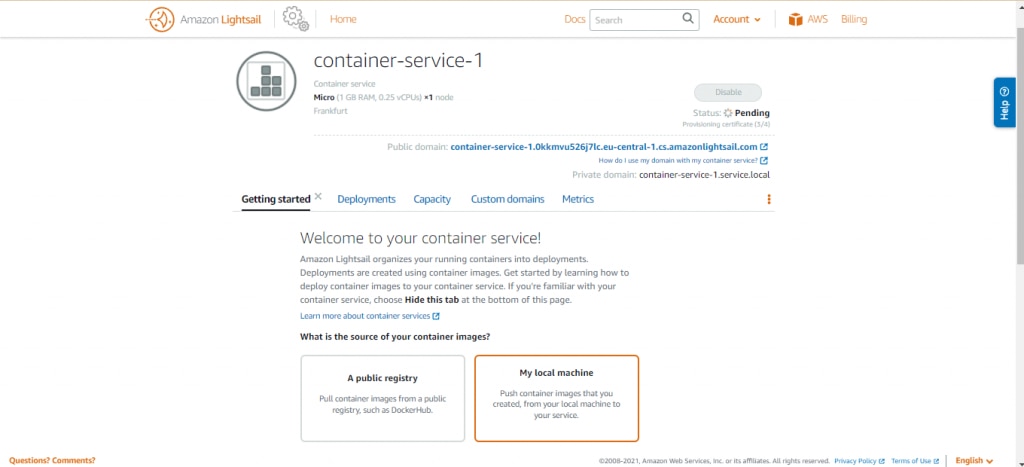
In the next step, you’ll create a container image and push it to the Amazon Lightsail container service.
Create a Dockerfile and Build a Container Image
We’ll build a static website on a Docker image. For this tutorial, you can use an existing static site from this GitHub repository: Web-story-Hello-World.
Next, clone the repository into your local machine and open it in your code editor.
Create a file and name it Dockerfile without a file extension. Then, copy and paste the code below into the Dockerfile:
FROM ubuntu:18.04

# Install dependencies

RUN apt-get update && \

    apt-get -y install apache2

# Copy html directory files

COPY index.html /var/www/html/

# Open port 80

EXPOSE 80

CMD ["/usr/sbin/apache2ctl", "-D", "FOREGROUND"]
The code above installs the Ubuntu 18.04 image. It then gets updates on packages, installs, and configures the Apache server. Afterward, it copies the HTML file into the web server and exposes it on port 80.
Next, build the container image using the command below:
docker build -t web-story-hello-world .A Docker image is a container’s own private file system. It contains all the files and codes your container requires.
To view the container image, run the command below:
docker images --filter reference=web-story-hello-worldTo view your running containers, run the command below:
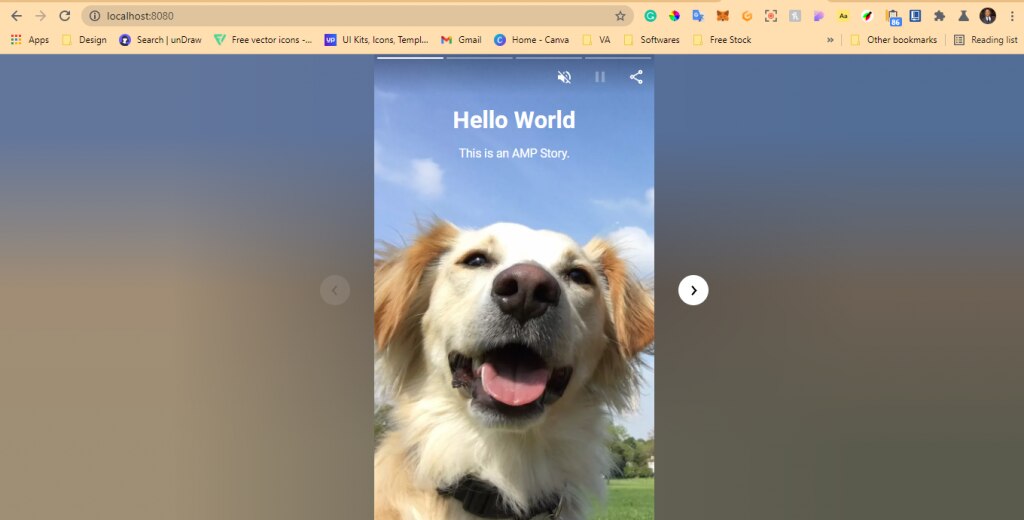
docker container run -d -p 8080:80 --name web-story-hello-world web-story-hello-world:latestWhen you run a container, your application is launched with private resources securely isolated from the rest of your machine.
Open your web browser and go to http://localhost:8080 to view your containerized website.
Push the Container Image to Docker Hub
The reason you might want to push your container image to Docker Hub is to connect your container image with AWS Lightsail, which is the fastest and easiest method of deployment. To do this, run the following commands.
First, get the container ID by running the command below. This is because you use the container ID to commit the container image.
docker ps -aqf "name=web-story-hello-world"After getting the container ID, commit your container image with the command below:
docker container commit 86d155c0d769 web-story-hello-world:latestNow, push your container to Docker Hub:
docker push drje/web-story-hello-world:latestThen, log in to your Docker Hub account to see your run container.
Push the Container Image From Docker Hub to Your Amazon Lightsail Container Services
After building your container image, you can now easily push the container image to your AWS Lightsail container service.
Log in to your AWS console and navigate to the Lightsail console. Then, go to the container tab.

Copy and paste your container information from Docker Hub to fill the form.

After filling in the required details, save and deploy your container image.
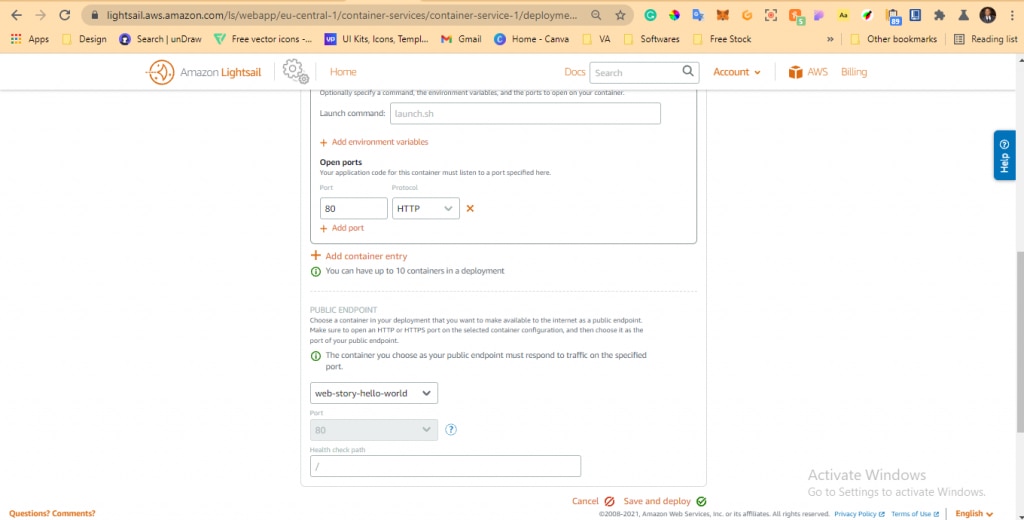
Congrats! You’ve successfully deployed a container image on AWS Lightsail. You can view it by visiting the public domain link at the top right corner of your container service dashboard. Check out my container here.

Getting Started With Kubernetes
Now, let’s create a simple Kubernetes cluster on AWS Elastic Kubernetes Service using eksctl (the command tool for EKS).
This step is independent of the previous one.
A command line tool for working with EKS clusters, eksctl automates many individual tasks. To install eksctl for your operating system, check out this link. With one eksctl command, you can create a Kubernetes cluster and add whatever configuration you want for your cluster.
Create a Cluster Using the eksctl Command
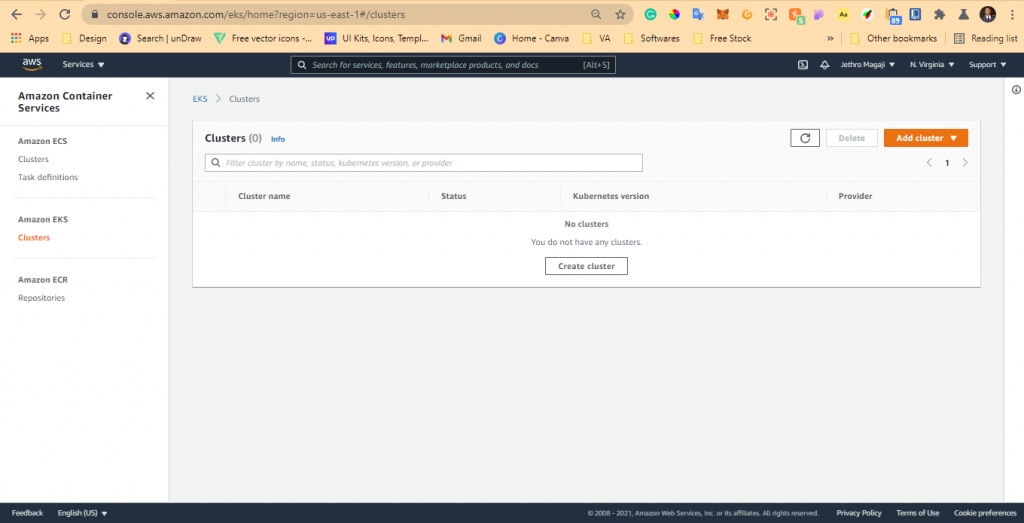
Log in to your AWS console and navigate to the EKS console.
Note: eksctl needs to authenticate with AWS using your ~/ .aws/credentials in your local machine. Do this by downloading the AWS CLI and then running aws config to configure it to your AWS account.
eksctl create cluster --name test-cluster --version 1.21 --region eu-central-1 --nodegroup-name linux-node --node-type t2.micro --nodes 2Your CLI should look like this:

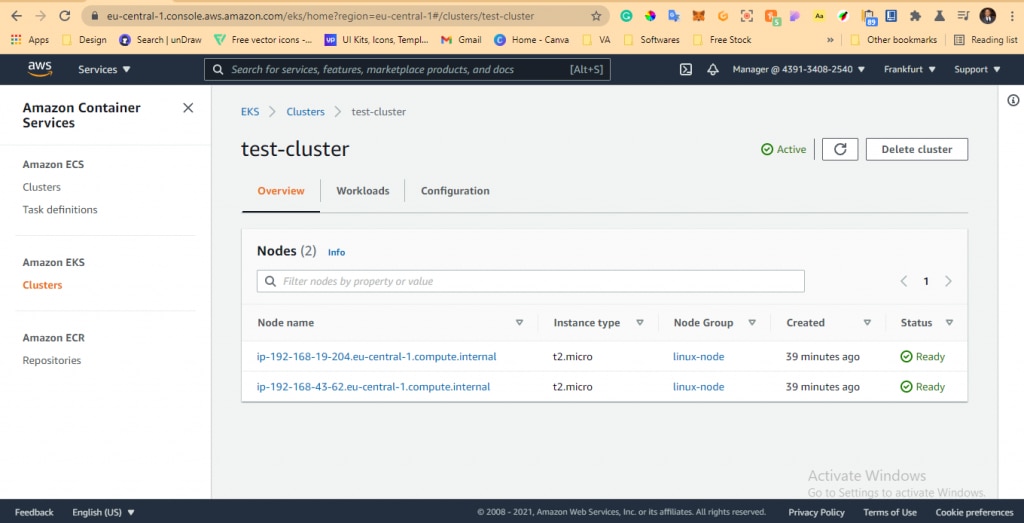
After a successful build, you’ll get a message like this: EKS cluster “test-cluster” in “eu-central-1” region is ready.
Next, go to your AWS EKS console to view the Kubernetes clusters you’ve deployed.
Don’t forget to delete the cluster after this tutorial to avoid charges in the future by AWS.
Using Docker and Kubernetes Together
Here, you’ll push your Dockerized application to Kubernetes.
Create a file in your app folder and name it deployment.yaml. Then, copy and paste the code below into it:
apiVersion: v1

kind: Service

metadata:

  name: web-story-hello-world-service

spec:

  selector:

    app: web-story-hello-world

  ports:

  - protocol: "TCP"

    port: 6000

    targetPort: 5000

  type: LoadBalancer

---

apiVersion: apps/v1

kind: Deployment

metadata:

  name: web-story-hello-world

  labels:

    app: nginx

spec:

  replicas: 3

  selector:

    matchLabels:

      app: web-story-hello-world

  template:

    metadata:

      labels:

        app: web-story-hello-world

    spec:

      containers:

      - name: web-story-hello-world

        image: drje/web-story-hello-world

        resources:

          limits:

            memory: 512Mi

            cpu: "1"

          requests:

            memory: 256Mi

            cpu: "0.2"

        ports:

        - containerPort: 5000
The code above creates a service and deployment for your application. The service creates a load balancer and exposes it to port 5000, and the deployment uses your container image, allocates resources for your container, and exposes your container to port 5000.
With this done, deploy your app to Kubernetes by running the command below:
kubectl apply -f deployment.yamlTo view your app on Kubernetes, run the following commands. The command below starts minikube:
minikube startAnd this command opens the Kubernetes dashboard so you can visualize your application:
minikube dashboardLastly, make your service accessible on a web browser. Do this by running the command below:
minikube service web-story-hello-world-serviceConclusion
In this article, you learned about the containerization technology in Docker and the container management capabilities and limits of Kubernetes.
You then used Docker and Kubernetes to containerize and manage an application before deploying it on AWS.
Please don’t forget to shut down all services or instances you’ve created for the tutorial, as leaving them active may result in charges.
If you want monitor and get log messages for your container service or Kubernetes cluster, I suggest you use SolarWinds® Papertrail™. Papertrail is a frustration-free log management software designed to help you analyze, tail, and search your log messages. It’s easy and fast to set up, with powerful integrations, team visibility, and a lot more. Try it today.
This post was written by Jethro Magaji. Jethro is a front-end engineer who’s passionate about the tech world and uses creative thinking to solve business problems with a user-centered approach.
Want something different? Try the SolarWinds docker monitoring